If your IT ecosystem is, as is the case in most companies, a tower of babel plagued by different applications that speak different languages, this blog is of interest to you!
We have already talked about the problems that occur in most companies when it comes to integrating the different applications in use. In that case, we presented iPaaS (Integration Platform as a Service) solutions and, more specifically, we showed you the 4 key factors for choosing the best iPaaS.
This time, we will go into detail, and we will see, step by step, how to integrate into Oracle Integration Cloud Service, a managed service offered by Oracle in its public cloud that combines the experience gained after years of evolution of its on-premises integration software with the simplicity and ease of use inherent to a PaaS.
%20-%20BLOG%20-%20Unikal%20-%20DIG.png?width=600&height=338&name=IMG%20RRSS%20(ING)%20-%20BLOG%20-%20Unikal%20-%20DIG.png)
There are usually several ways to carry out the integration of 2 applications. The most immediate, and the one that has traditionally been used, is the development of adhoc solutions (either internally developed or from a third party) to carry out a specific integration, which partially solves the problem, since it does not cover the rest of the integrations.
In this sense, the experience that we have gained at Neteris thanks to the work we have carried out
Several customers tell us that the ideal is to deploy not an integration, but an integration hub that allows us to centralize all the needs in this area, achieving:
- Standardization
- Optimization
- Reduction of operating costs
- Economies of scale
- Centralization, analysis, and improvement capacity
How to build an ORACLE OIC Integration?
Well, having understood the importance of having an integration HUB in your company, we will now show you, with an example of a fictitious client, the ease of use I was talking about previously:
1 Selection of the first end of the integration
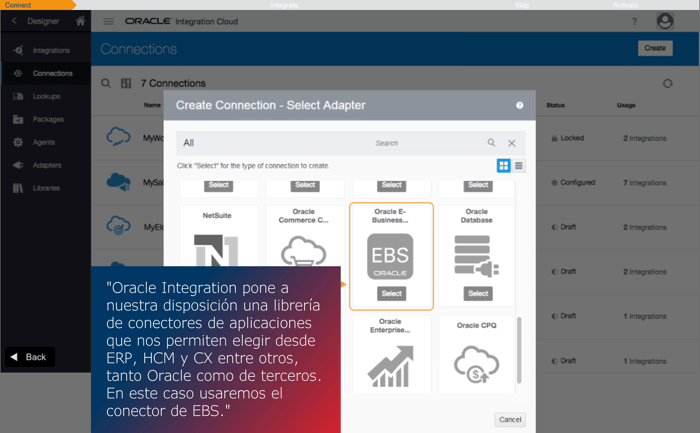
At this point, we will select the application to which we want to connect; therefore, we will select the appropriate connector (from among the more than 70 adapters available on the platform). We will have to provide the URL and access credentials to the platform we are referring to (Oracle EBS in this case), and thus create one of the integration endpoints.
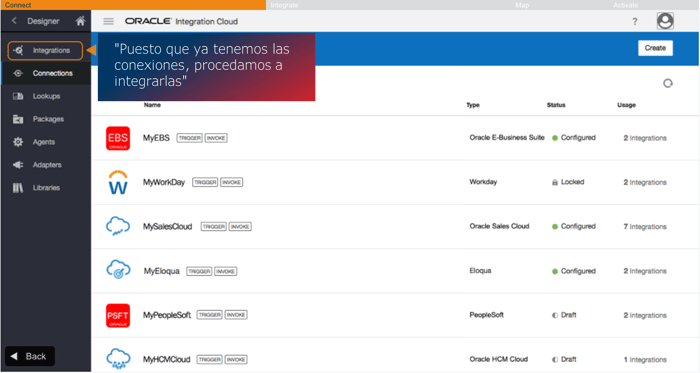
2 Selecting the second end of the connection
We will repeat the previous step, selecting the other end of the integration, that is, the other application to be connected to the one we have previously selected.
It is important to understand that, being an integration HUB, we can create as many connections as we want, so we can repeat this step for each and every application we want to connect through Oracle Integration Cloud.
3 Creating the integration
In the following image, we can see that, once we have the connectors to our applications configured, we have to proceed to the creation of the integrations:
When entering the integrations menu, we must choose how we want this integration to be carried out. Among others, we can choose to initiate the process when receiving communication through an API or when an event appears in an application, or even in a scheduled manner for integration needs associated with batch processes.
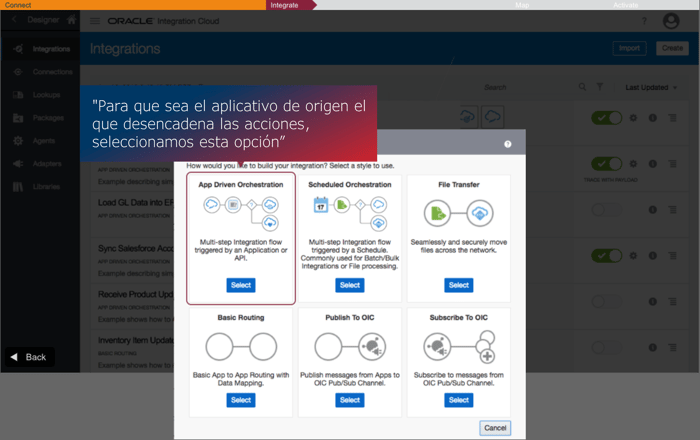
In this case, as an example, we want to synchronize orders between an on-premises ERP and a Cloud ERP.
Depending on the source application, and since the connector has been designed taking into account its functionalities, we will be offered one or another option.
In this case, the trigger will be an order status update, as shown below:
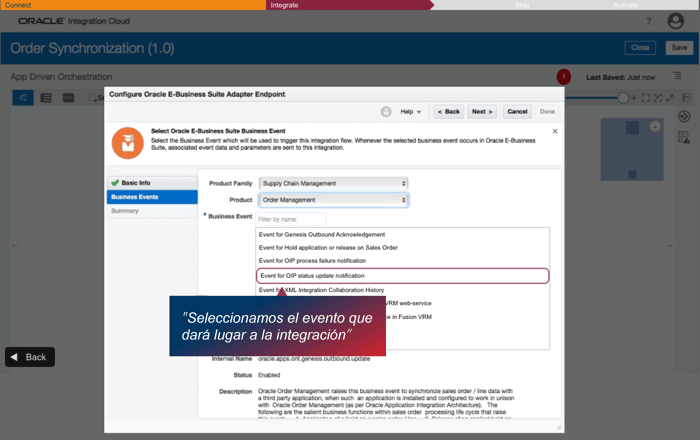
Once the end-point that triggers the integration has been configured, we have to proceed to configure what is going to happen, i.e., what the other end-point has to do in response.
In this case, a new order will be created, synchronizing both ERPs.

4 Mapping of information
Once the integration has been built, it is of vital importance to ensure that there is a correct mapping of the information, i.e., that the master data fields sent by the endpoint that originates the integration are correctly mapped to the schema of the destination. It is necessary to understand that, for example, the customer name at the source may be in the "Customer Name" field while at the destination it may be in the "Customer" field.
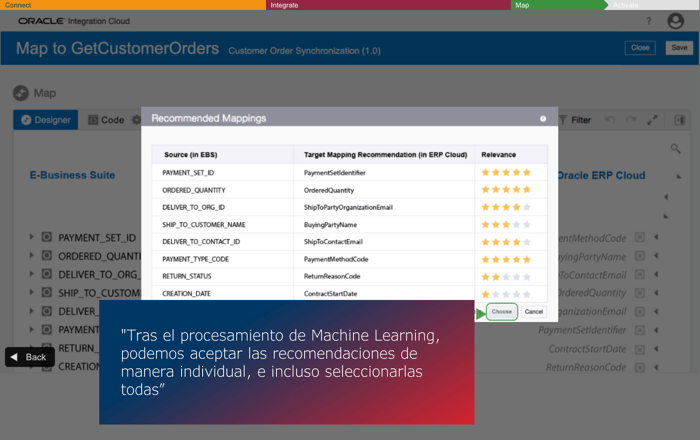
Graphically, as can be seen in the editor, it is shown as follows:

At this point, we can do a manual mapping (the tool allows us to drag and drop the fields in origin with the fields in destination), although we are also offered the possibility to use the mappings recommended by the tool after applying Artificial Intelligence and ML algorithms.
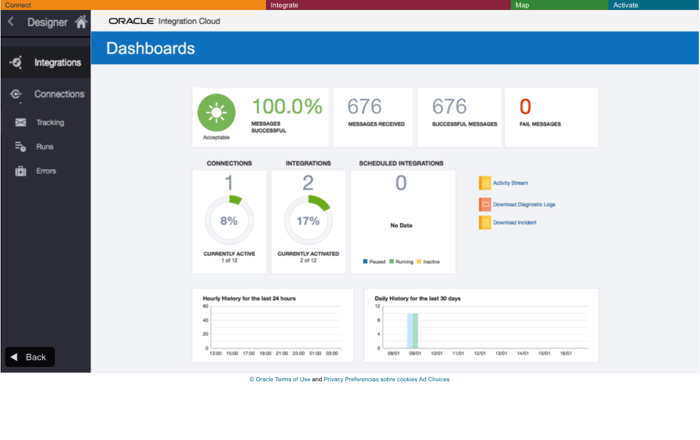
The last step is to activate the integration and check that we have done it correctly.
To do this, Oracle Integration offers a dashboard that allows us to monitor the integration: